
I did it! I got through the front!
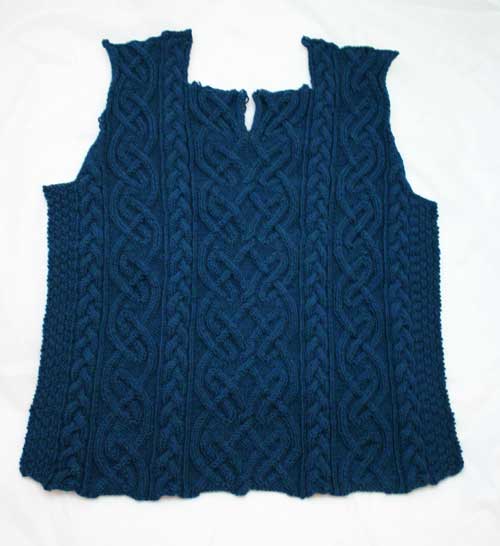
i’m a little curvy since i’m still unblocked
And damn if it doesn’t feel good. For the first time on this project, I feel like it’s completely doable. Not just if-I-hope-and-pray-and-don’t-have-to-rip-back-too-much-or-f-up-the-armholes-or-the-front-split.
A couple details:

front split
I’m giving enough detail so someone else could copy me if that’s of any interest. I’m sure I won’t remember this in a few months.
The front consists of 8 repeats of the main cables. I split the front at the start of repeat 6. Instead of continuing with the Chart D (the big center chart) I split them into Chart E (split) Chart C.
Then, to make a smooth edge, I did an attached 3-stitch i-cord edge flanked by a single purl stitch as follows:
row 3 Follow Chart C. You’ll have one extra purl stitch in the middle before you start to follow Chart E. Increase 1 using a lifted increase, knit f&b into the center purl stitch (these 2 sts split to form each of the i-cord edges), increase 1 using a lifted increase, and then follow Chart E.
row 4 When you get to the area with the new increases, slip the first increase purlwise wyif, m1 knitwise, slip the next st purlwise wyif. Attach a new ball of yarn, slip next st purlwise wyif, m1 knitwise, slip next st purlwise wyif, knit Chart C.
At this point, your attached i-cord has been setup. Next step is to add in the purl stitch between the i-cord and the cables.
row 5 Knit in pattern until you reach the i-cord. M1 purlwise, k1, slip 1 purlwise wyif, k1. With other ball of yarn, k1, slip 1 purlwise wyif, k1, m1 purlwise, cont with Chart E.
All following WS rows Cont in patt to purl st before i-cord, k1, slip 1 purlwise wyif, k1, slip 1 purlwise wyif. With other ball of yarn, slip 1 purlwise wyif, k1, slip 1 purlwise wyif, k1, cont in patt.
You’ve now split the neck and have an i-cord on each edge.
setup for hood
As you can probably guess by now, I’m going to continue the cables flanking the i-cord all the way around the hood. To give the hood a comfortable fit, I stopped knitting the center cable one repeat before the end (in other words, I knit 7 repeats instead of 8). Those stitches are on some waste yarn and I’ll pick them back up and continue once I start knitting the hood.
armhole decreases
I find that armholes can often distort in the curved area, misshaping it and creating a larger armhole than I wanted. To address this, I slipped the first stitch of each row.
For aesthetics, I also decreased into the armhole. So, at the start of rows I did a k2tog, and at the end of rows, I did a ssk. I did these decreases one stitch in from the edge.
So, decrease rows went as follows (always on a RS row):
Slip 1, k2tog, cont in patt until 3 sts rem, ssk, k1.
All WS rows were:
Slip 1, cont in patt until end
Once the decreases were finished, I stopped slipping the first stitch because I didn’t want the armhole to bind. I just wanted to give it some extra support.
shoulder bindoff with cables
This is the place where I winged it the most. If I just bound off I would have had too much cable splay — the bound off edge would have been wider than the garment itself.
After a little experimentation, the solution that worked in most cases was to decrease whenever 2 cables would have eventually crossed. Occasionally, I’d notice there was still a bit of splay, so I’d tink back, decrease another stitch, and continue on.
staging the front
What would a St Brigid post be without showing you how I took the pics? With autumn’s arrival, morning light is getting less abundant. Lolly’s post this morning reminded me of my own light tent. So, I took it out of the back of the closet so I could get some decent pics early enough this morning.

Thank you!
If you’ve made it this far then you deserve a huge thank you! All your comments have really motivated me to keep on going. And while I haven’t personally responded to each one, I want you to know how much they’re really appreciated. Thank you thank you thank you!


It’s just beautiful! And thank goodness for light tents! Love mine.
WOW. Excellent progress. Thanks for the updates on your St. Brigid (revised and amended version). I love the sweater and (I hope) I’m learning from seeing your design changes.
Lovely!
The colorway is perfect for that pattern.
Looking awesome! Can’t wait to see it all together. That’s a huge accomplishment to keep in your timeframe.
Way to go! The both big pieces are done, and they look fabulous! And thank you for the details.
Yay! It looks gorgeous, Jody, it really does.
Really, really, really nice.
I am so impressed, Jody. It is amazing. I love the heathery colors and the intricate cabling. And what a great little light box
Hooray! I’m glad you’ve gotten so much done, and that you’re feeling better about your progress.
it’s gorgeous, Jody!
That’s some awesome and intrepid knitting! If it’s already this gorgeous in pieces, I’m really looking forward to seeing the final product.
It looks so great! I absolutely love your color choice.
So beautiful. You are still my knitting superhero, you know! And now I want to get a light tent, too. It must be easier than your last photoshoot with the coffee table book, no?
I bow down before you, tech goddess. I’ve been holding my breath for you from afar during this entire knit. Looks great!
I can’t wait to see the FO.
awesome! keep on knittin’ girl!
i should do some image uploading while Mike’s napping… er, i mean, “watching the game”….
My gosh it’s beautiful!!
Wow, it’s lovely! It’s going to be amazing when it’s done
Excellent post, Jody. I learned a lot. I had not thought of slipping the armhole stitches to stabilize them. Oh yeah, your sweater is gorgeous, too.
St Brigid is going to be beautiful! It’s making me think that I should knit something cable-y, too.
woo hoo!! This is SO exciting.
Neat to see your light tent, too — I’ve been thinking about building a light box, but the tent is tempting…
It looks FABULOUS!
You have totally stuck with this and I just know that you are going to get 9 zillion compliments on this at Rhinebck.
I’m so proud of you. That’s weird, right?
wow. that is amazing!!!! it looks great!
is that one of those fabric collapsible cubes?? very creative!
I just got Aran Knitting from the library and have to look through it…
Lookin’ good! And I really need one of those tent things. I never get good light in my home. Yes, I’m aware that that’s depressing.
OMG. It’s gorgeous. I wish I was going to Rhinebeck, but I guess I’ll just have to settle for seeing your FO pic. Wow.
St. Brigid is looking completely fantastic. Great job so far.
You must be over the moon. It looks fantastic! How exciting.
Wow, that piece is coming along beautifully, and I have a serious crush on that yarn. The finished piece is going to be phenomenal.
It’s so gorgeous, I got chills! Wow! And the color! Beautiful!
HOLY COW! That looks awesome!
gorgeous!
i need to pick mine back up…
Absolutely beautiful! And the color is just wonderful with the pattern. I can’t wait to see it all finished.
Inspirational – good job!
I wish I was as smart as you. I never quite know what to do with the cables on a sweater when you start decreasing them out. I just kind of let them wander on my tweed pullover. I’ll know better next time!
Your Brigid is going to look so awesome!
wow it looks so good! congrats on finishing the front! its going to be so awesome!
Yipee!
you are doing awesome!
How amazing are you?? That is amazing Jodi! I am so impressed with your knitting skillz (because the”s” just doesn’t even touch on how great that sweater shaping/knitting up)!
So beautiful. It looks amazing.
Incredible. Truly incredible. Bravo!!
Beautiful! Fingers crossed for smooth sailing for the rest of the pattern!